Posted on Wednesday, February 20, 2019


By: David DiFalco | DC Cameraman, Go To Team
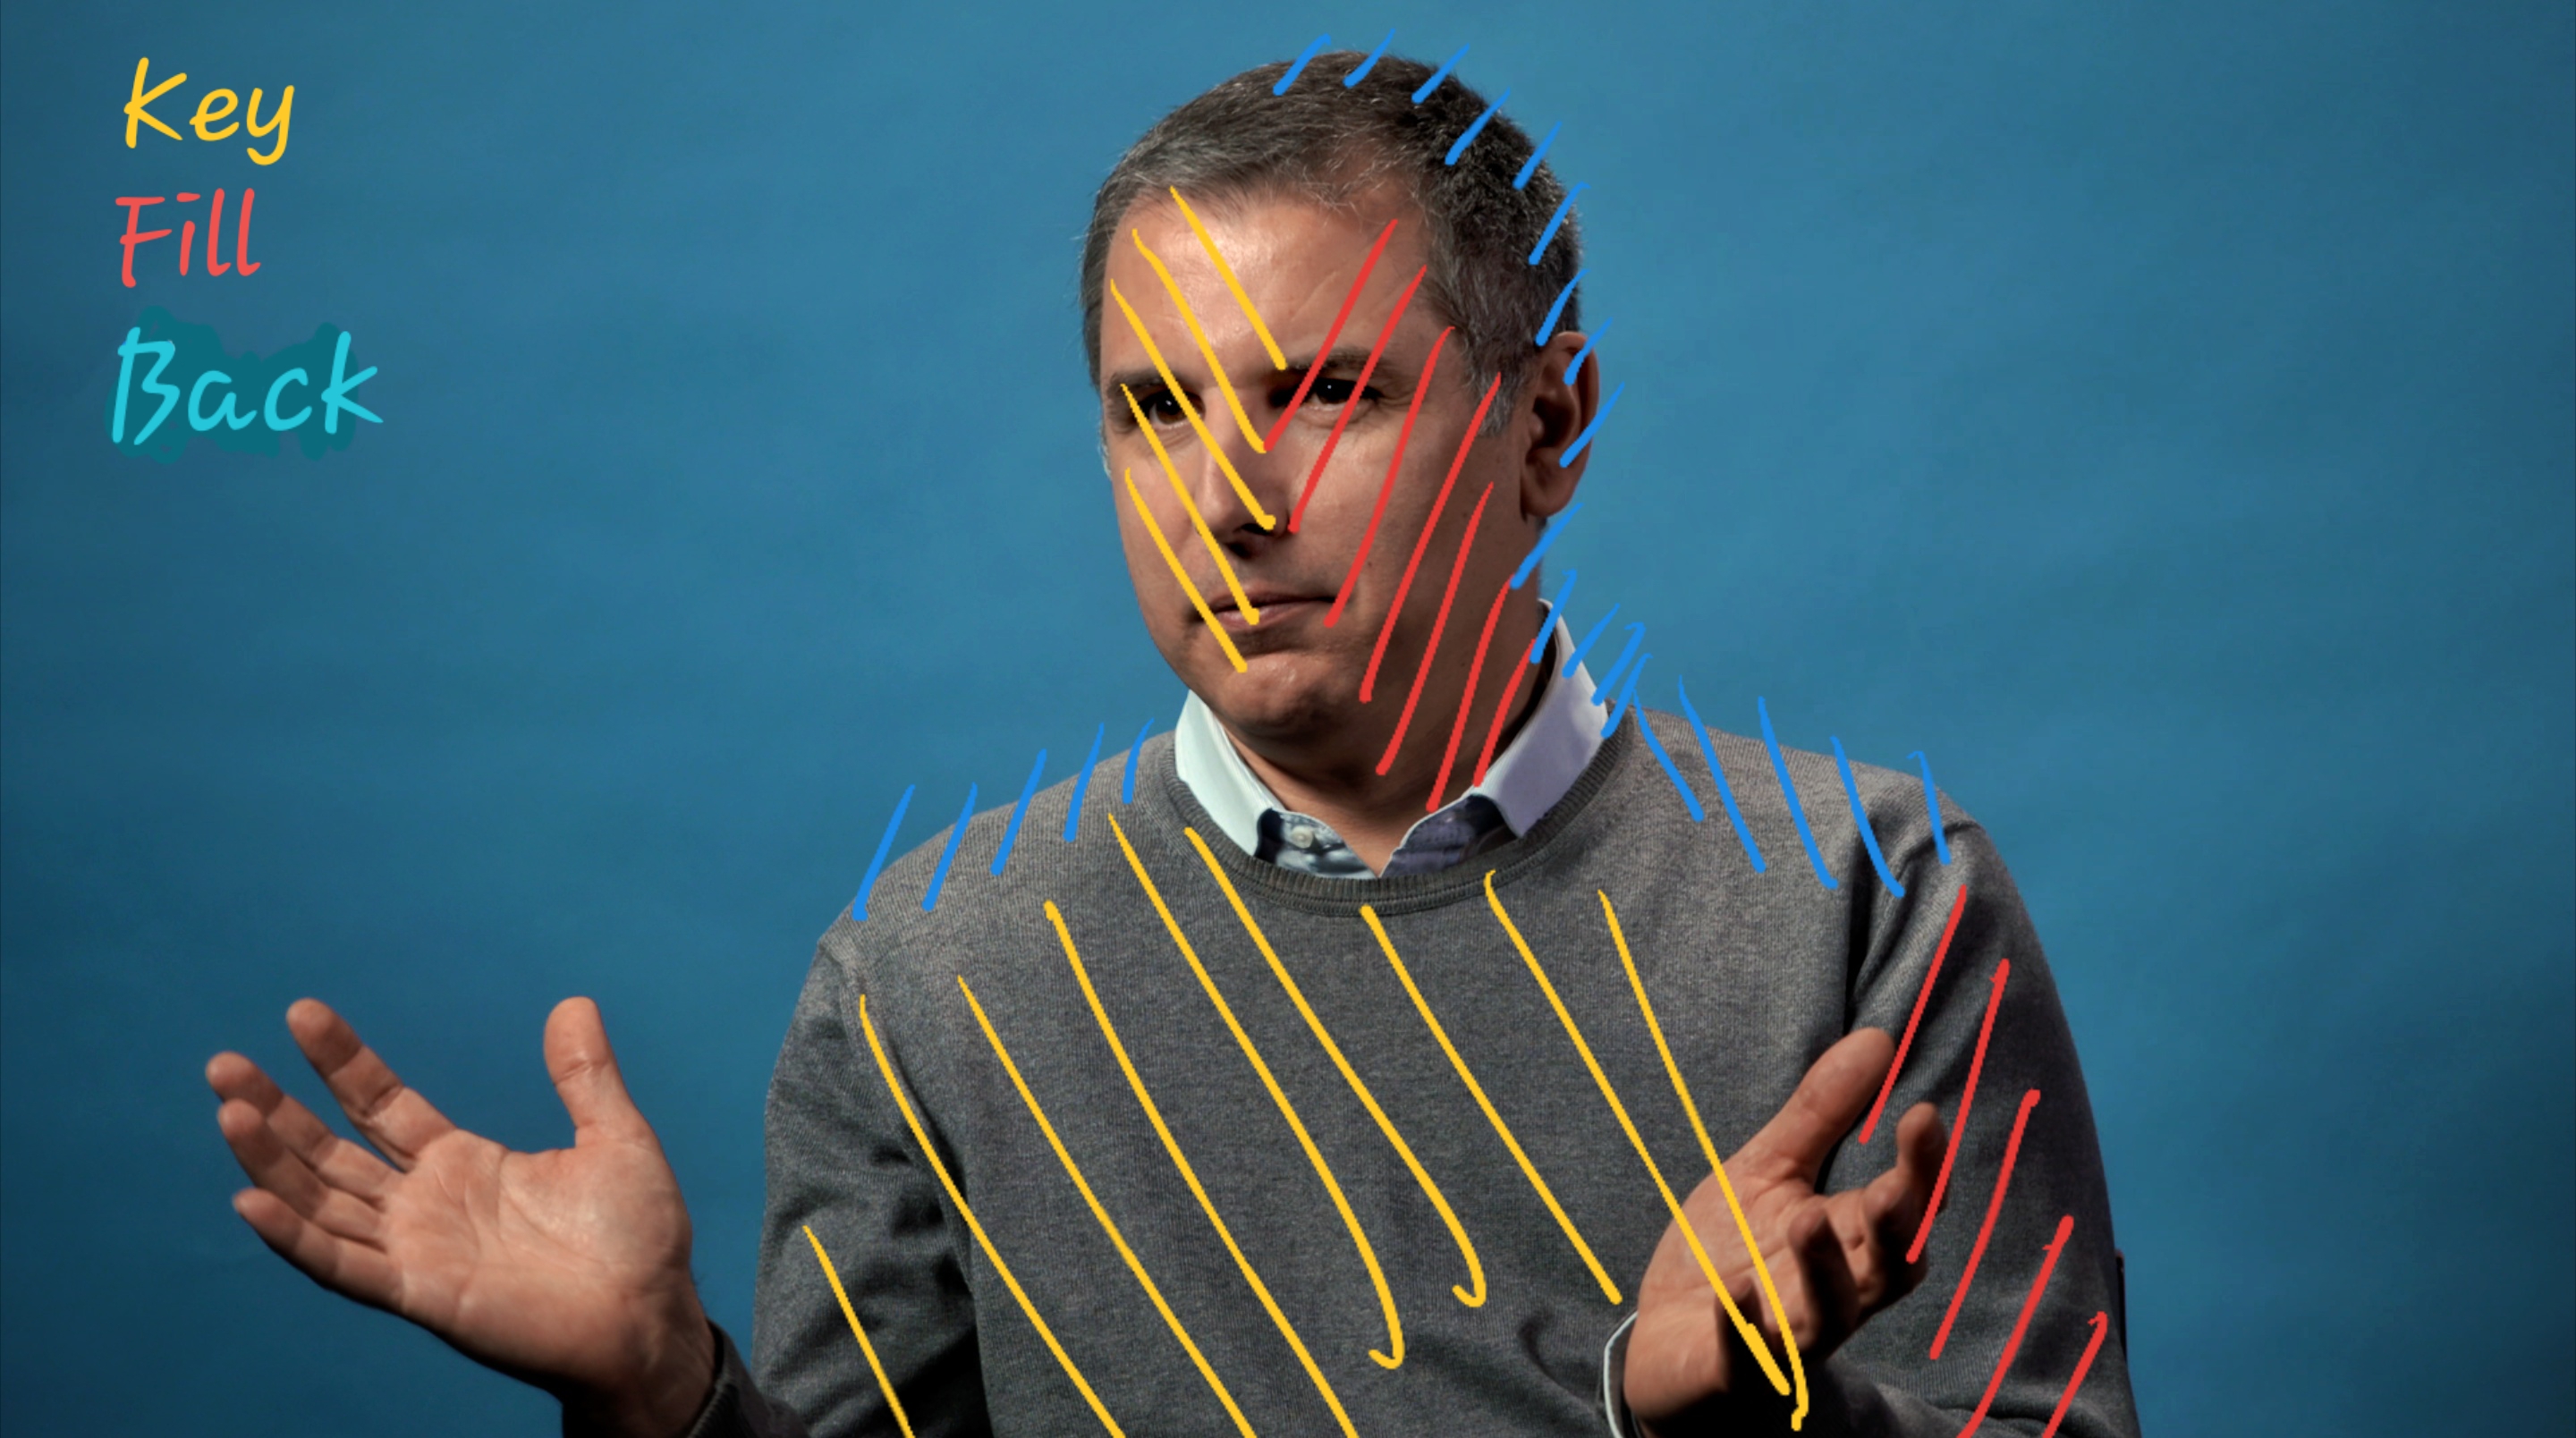
Have you ever wondered how to get the perfect interview lighting? We have a secret: It’s all about the 3-point setup. Go To Team’s DC cameraman, David DiFalco has dished the scoop on how to achieve the perfect 3- point lighting setup…even if you are using someone else’s gear!
DiFalco recently worked with IBM to help capture employee interviews, as well as “get to know me” videos to help improve their website and LinkedIn profiles. Here are the techniques he used to achieve the perfect interview lighting:
Key Light:

When lights are provided you should order them from brightest to dimmest. Your Key Light (indicated throughout the examples in YELLOW) should always be your brightest light. This is your main source of light on your subject. This light should wrap light around your subject’s face and body leaving a slightly darker side to their face.
Fill Light:

Next, your medium brightness light will be your Fill Light (indicated in RED). This light provides a little bit of light to brighten up the shadows caused by your key light. Depending on the mood of the piece this could either be a very subtle increase leaving most of your shadow (also known as “modeling”) on your subjects face, to a major increase almost exposing the shadowed side the same as the key. For this example, we wanted to go in between the two.
Back Light:
Now that the front of your subject is properly lit, we need to make them separate from the background a little bit. This is when your Back Light (indicated by BLUE) comes into play. Since this is a light that usually should go unnoticed but makes a major difference, this should be your dimmest light. Its purpose is to cause a slight outline around your subject so they don’t blend in with the background. Even the most subtle lights make a world of difference in the end.

So next time you’re not feeling great about using someone else’s gear that you have never seen before, just remember this little tip and you can set up a good looking interview with confidence.

For my set up I used a Kino Flo 4×2 as my Key light on a slight angle so not only did I light the subject’s face but also their body and parts of the background.
I followed suit with my fill light using a Kino Flo Diva. I used the Kino Flo Diva to hit our subjects’ face, arms, and background. Lastly, I had a 1×1 Astra light panel that I used as my backlight. I hid this behind our backdrop for ease of setup but you can also arm it out over your subject if you are using a natural background instead of a backdrop.

I hope you found this useful and happy shooting!

Recent Blog Posts
From Layoff to In-Demand DP: How Josh Hendrix Built a Multi-Market Freelance Career with ProductionHUB
Posted on 12/9/2025
Why Human-Centered Storytelling Matters Now More Than Ever: A Conversation with Sarah Nix-Ward
Posted on 12/2/2025
How ProductionHUB Helped DP Willie Shaw Land His Dream Shoots in Seattle
Posted on 11/25/2025
The Real Cloud Strategy in Post: Flexibility, Not Absolutes
Posted on 11/4/2025
The Cinebot Mini Goes Back To School
Posted on 10/21/2025

